

We've recently launched a new feature in custom domains that lets you download a DNS file that contains all the DNS settings you need to configure your blog on a custom domain.
GoDaddy DNS service supports this feature so Let's show you how it's done:
For this demo, I assume you have an existing blog and you have already purchased a domain on GoDaddy.
Step 1: Go to the Settings Tab of your blog in the Blogger UI and click on the "Add a custom domain" link.


Step 3: You will get an error. It's expected as you have not configured GoDaddy with the DNS settings required. Now click on the "DNS settings file" link and save the file. Keep this window open, you'll need it later.
.png)
Step 4: In a new window, go to GoDaddy, login, go to the Domain Control Panel and click on your domain name.

Step 5: Click on the "DNS Zone File" tab.
.png)
Step 6: Click on the Edit button.

Step 7: We need to delete some of the existing records that GoDaddy adds by default. Select all the "A" records with "@" as host as well as the CNAME record "www" (if the URL you want to use starts with www) and press the Delete button.

Step 8: Press the "Save Zone File" button.

Step 9: Press Ok to confirm.

Step 10: Press Ok to confirm again. :)

Step 11: Now let's load the new records. Click the Import/Export button and select "Import".

Step 12: Click "Select File" and find the file you have saved in step 3, then click the "I understand ..." checkbox and press the Ok button.

Step 13: Press Ok to confirm.

Step 14: You should be able to see your new records loaded in GoDaddy. Four "A" records as well as two CNAME records. All good.

Step 15: Go back to the Blogger settings window we kept open in Step 3 and click "Save" again.

Step 16: If like me the GoDaddy DNS server processed the changes really quickly, it should all work fine and the settings should be accepted. You should be back to the main settings with your new custom domain accepted as the blog Address. So click on "Edit".

If Step 16 fails, be patient and retry later. It can take up to 48h for DNS settings to propagate.
Step 17: Enable the "Redirect ..." checkbox and press Save. This is to allow "naked domain" redirect i.e. when users type your domain name without the www at the beginning.

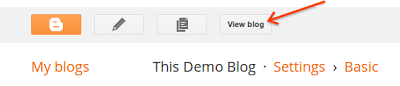
Step 18: Finally click the "View blog" button at the top of Blogger UI, it should all work fine and your blog should now be enabled with a custom domain.
255 Comments
Click here for Comments «Oldest ‹Older 401 – 255 of 255 Newer› Newest»Out Of Topic Show Conversion CodeHide conversion Code Show EmoticonHide Emoticon